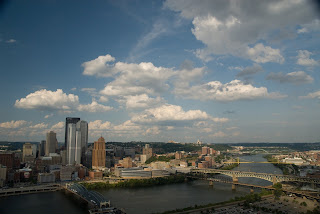
The first image is an image I shot last month when shooting the team photos for the Silver Ring Thing tour team. The day was beautiful with very nice clouds and good light. However, this image was shot in the late afternoon which rarely provides the dramatic light needed for an interesting photo.
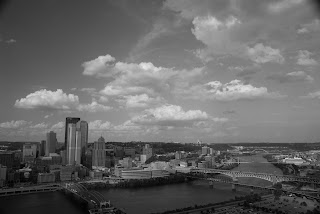
However with all the different lines and shades, it looked like a great photo to convert to black and white. The second image is a quick conversion using the grayscale button in Lightroom [LR].

The second image is your basic grayscale image. It has no 'pop' or wow factor to it and is basically a very 'flat' image.
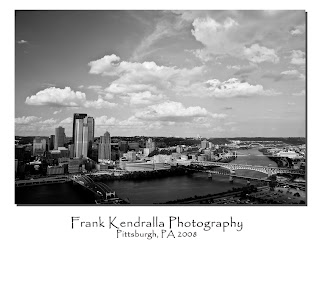
The third image is a Black and White conversion utilizing the many powerful tools in LR 2.1. A few of the tips I will outline are not available in LR 1.4 [clarity tool].

[All the instructions are based on the assumption of shooting in RAW.]
- Click on the develop module
- Click on Grayscale in the HSL/Color/Grayscale section below the basic section in the develop module.
- Under the 'basic' set of tools adjust the black slider to the right until you darken the image to a manner that is pleasing to you. [Do not worry if it is too dark, we will address it later.]
- In this photo I adjusted the black to +18.
- If the black causes parts of your image to be too dark, adjust your exposure to bring out the images that are too dark. In this example I adjusted the exposure to +.95.
- I adjusted the recovery slider to +18 to bring out the impact of the clouds. [Play with the recovery slider to enhance the appearance of your sky.]
- My next task was to bring out the midtones and the tool I used was the clarity tool. [It is not available in LR 1.4]. I adjusted it to +100. [Play with this tool and see the impact to using a negative clarity value.] It creates a dreamy effect around -50 to -100. Go ahead and play, you can always move it back to the original position.
- Move down to the tone curve section and adjust your point curve to strong contrast. Notice the change in the image.
- In this image I 'cropped' the image slightly to eliminate the vignetting in the upper corners from shooting very wide. [Hit the R key and it will take you to the crop mode, then adjust accordingly.]
- Adjust the sharpening slightly
- Export to PS to add the border and text
I hope this tutorial helps! Go out and capture the beauty of life!

No comments:
Post a Comment